
USB Reader for Embroidery Machines
About the ‘Black Box’ – External Embroidery USB Reader


For Tajima, Barudan, Toyota, SWF and Happy
(C) 2009-2018 PLR Electronics

External USB reader for commercial embroidery equipment
This device is used to replace external tape readers or floppy disk readers. This will replace devices such as the TFD, FMC, FMC II, BEAT reader, Masis system or transfer software.
Work with Barudan 100 Series – B-Stand, Barudan 700 Series – B-Stand, Barudan 800 Series – B-Stand, Barudan BEAT IV (4) – B-Fem, Barudan BEDT – 9-pin Serial, Barudan BEJM – B-Dir, Barudan BEMR – B-Dir, Barudan BEMS no cable – B-Dir, Barudan BEMS w/ cable – B-Stand, Barudan BENS – B-Dir, Barudan BENT – 9-pin Serial, Barudan BESR – B-Dir, Happy – Small Parallel, Tajima TME/TMEF – 36-pin Parallel, Tajima TME-DC – 36-pin Parallel, Tajima TME-HC – 36-pin Parallel, Tajima TMFD – 36-pin Parallel, Tajima TMM – 36-pin Parallel, Toyota 800 – 25-pin Serial, Toyota 820/820A – 25-pin Serial, Toyota 830 – 25-pin Serial, Toyota 850/850AD – 9-pin Serial, Toyota 851 – 9-pin Serial, Toyota 860 – 9-pin Serial
Overview
Why should it be so hard to load files into your machine?
- Are you stumped trying to remember all the buttons to push? Are you tired of teaching your operators how to load a design, again and again?
- Are you keeping an old computer around (and keeping it working) just to load designs? And memorizing that as well?
- Are you still using floppy disks, hoping your mechanical floppy drive system made in the 1990’s can last just a few more days while chewing up hard-to-find double density floppy disks? (Or your taped-up high-density floppies?)
- Do you have more than one brand of machine, and need a consistent solution for all of them?
We have a better way!
The USB Reader made by PLR Electronics is designed to KEEP IT SIMPLE!
We offer one easy way to load designs, no matter what brand of machine you may have! Instructions listed below:
- Plug in your USB stick
- Spin the dial until your file is shown
- It’s ready to download!
Keep your profitable machines running! There is no reason to put down $50-$100k for new because you can’t get any old reader to work. Your faithful machine can still do the job, with just a little help!
Embroidery Machine Support
The USB Reader supports many embroidery machines using a pluggable “key” system, which matches to the type of machine. The brands supported are: Tajima, Barudan, Toyota, and Happy.
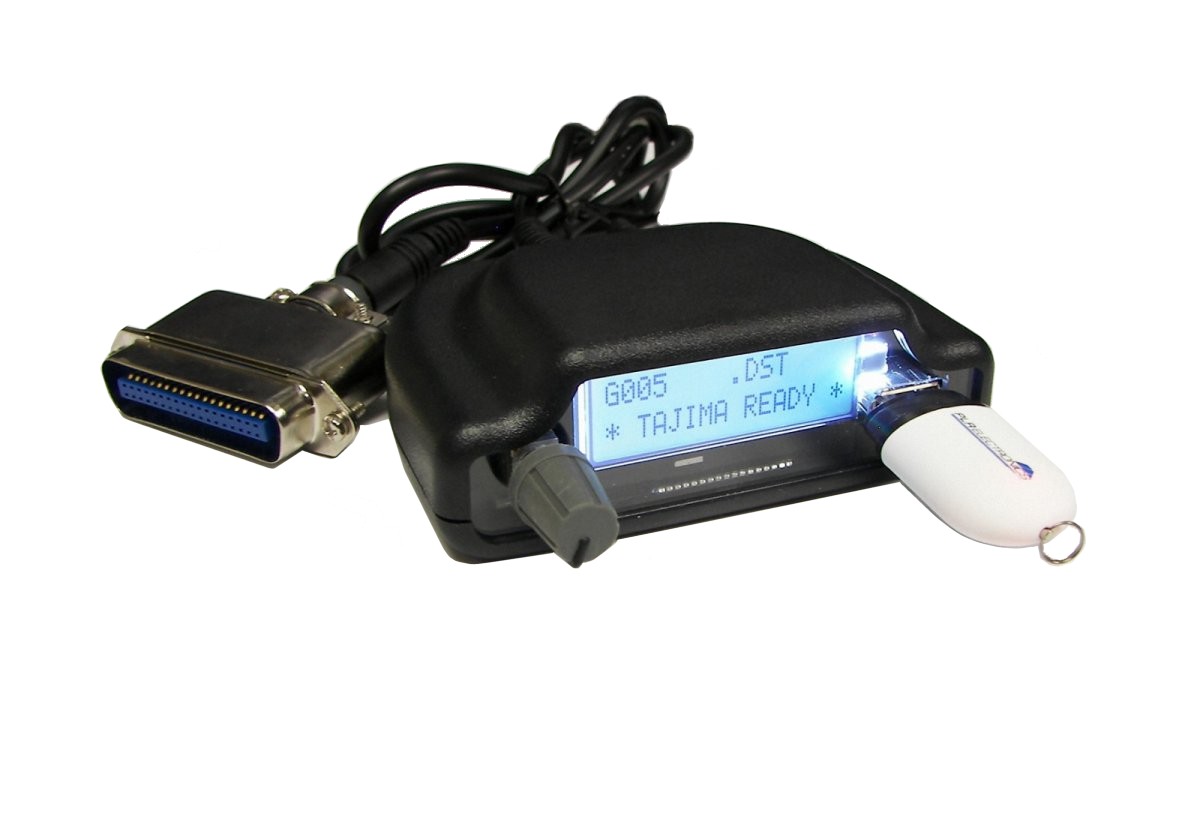
Tajima USB for Tajima embroidery machines
The Tajima USB Reader key supports every type of Tajima embroidery machine that has the standard tape reader port, which is a 36 pin female connector.
The usual models we’ve sold to include:
- Tajima TME-C
- Tajima TME-HC (very popular)
- Tajima TMEF-HC
- Tajima TMM (Melco control panel)
- Tajima TMFD
- Tajima TME-DC

The Tajima TMFX, Tajima TMEX, Tajima TFHX, Tajima TEHX and other such newer models are recommended to use our other product, the Tajima Floppy Drive to USB disk drive replacement, because Tajima decided to disable the TRACE feature if you load from the Tape or Serial port in their TMFX-style control panel. Customers with the TME-DC series, the TME-DC Type 1, TME-DC Type 2, etc., have the option of either the blacktop USB Reader or the alternative Floppy to USB replacement on our main page.
Please note that older embroidery machines were able to run one stitch at a time, instead of loading the entire pattern to memory. So when you are using your Tajima control panel, make sure you are using the memory option not the direct-from-tape option. Either way will work with the Tajima USB Reader. You will note, if you bypass memory, that only about 20 stitches or so will load, and then the reader will stop and wait for you to start sewing on your machine; most customers use memory and its recommended to load the entire stitch file from the Tajima USB Reader.
The Tajima USB Reader runs off of a 9 volt DC power supply brick (included), which plugs into the 110 or 100 volt AC line provided by the Tajima machine itself or from the 110V wall outlet (if in the US).
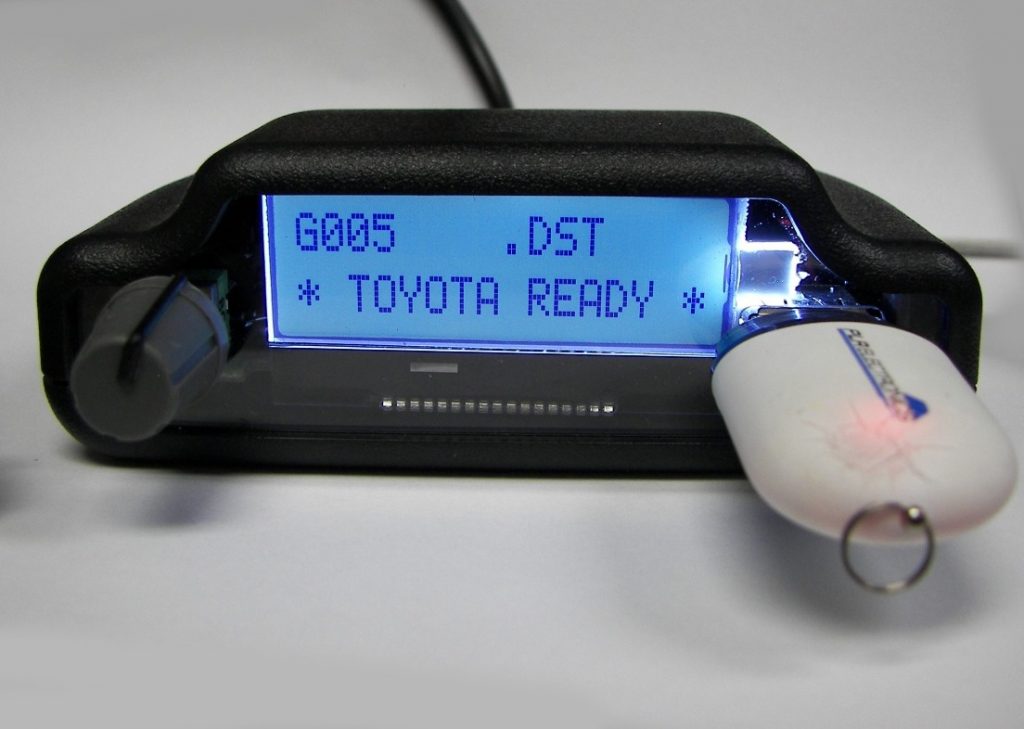
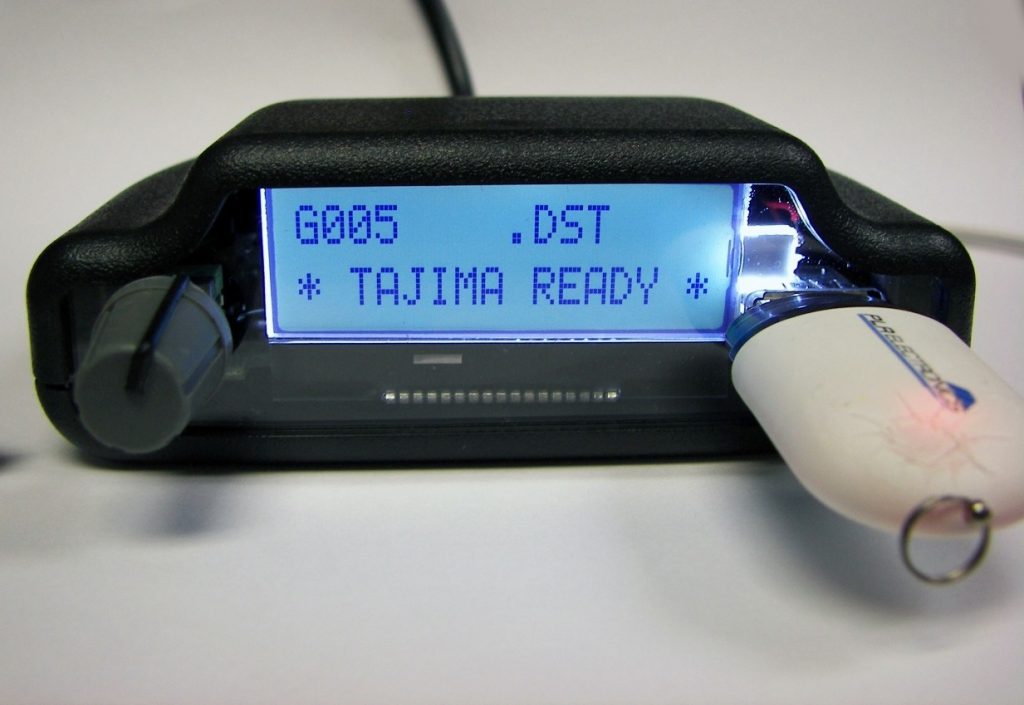
Be sure to use Tajima .DST files in the USB stick. The Tajima USB Reader will display two names when you are choosing files from the USB thumb drive; it will show the DOS name, and under that the Tajima DST name.

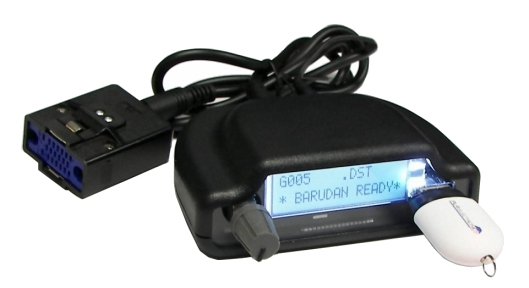
USB for Barudan Embroidery machines
The Barudan USB keys (of which there are three types) each support a different set of Barudan embroidery machines. This is because Barudan used many variants of its connector, as if they were not satisfied with the first one they tried.
The first type that we sell, which we call the Barudan standard key, plugs naturally into the cabling built-in to the following models:
- Barudan 100 series; Barudan 102, Barudan 106
- Barudan 700 series; Barudan PROFIT 702, PROFIT 706
- Barudan 800 series; Barudan BEAT 802, BEAT 806
The Barudan standard key is a male connector made by HIROSE, with a black case (with male D-shaped latches in the front) and a blue female 20-pin plug. We have seen this connector on other Barudan machines, usually on the BEMS series of machines, as a three foot long adapter cable. We do not recommend BEMS owners to purchase this type of key unless they are absolutely sure their 15 year old original Barudan adapter cable is still functional; we have seen many times where the wires and foil on the insides have fallen apart.
The second type of Barudan USB Reader key that we sell, which we call the Barudan female key, plugs only into the single-head model:
- Barudan BEAT-IV
This key plugs directly into the back of the Barudan BEAT-IV control panel. The BEAT-IV may still have an original Barudan adapter allowing you to use a standard HIROSE male, instead of just the HIROSE female, but because we do not make adapter cables we recommend the Barudan female key for this Barudan single-head machine.

The third type of Barudan USB Reader key is called the Barudan direct key. It is so-called because it plugs directly into the circuit board of the Barudan control panel, where the other types of keys plug into cables that already extend out of the machine, or to the panel-mount type of connector of the BEAT-IV. The following is the compatbility list:
- Barudan BEMS
- Barudan BEMR
- Barudan BESR
- Barudan BEJR
- Barudan BEJM
- Barudan BEHJ
- Barudan BENS
This type of key is distinctive from the others, where it has a large grey button which controls a hook; so it may securely latch and unlatch from the motherboard connector. We highly recommend the Barudan direct key for the listed types of machines because we’ve found that the long three-foot Barudan cabling usually degrades and breaks internally, leaving some of the 20 required wires non-functional because they’ve dried out and snapped, or the foil being used as a ground reference crumbled. The original Barudan cable used either black HIROSE ends or grey HONDA ends.
The Barudan direct key is intended to plug into the back of these control panels; you have to open the cover in the back to detach the original, unreliable data transfer cable and then plug our key in.
USB for Toyota Embroidery machines
The USB Reader for Toyota supports those machines with a 9 or 25 pin communications port in the back.
- Toyota 800
- Toyota 820
- Toyota 820A (six needle)
- Toyota 830 Expert (nine needle)
- Toyota 850
- Toyota 860

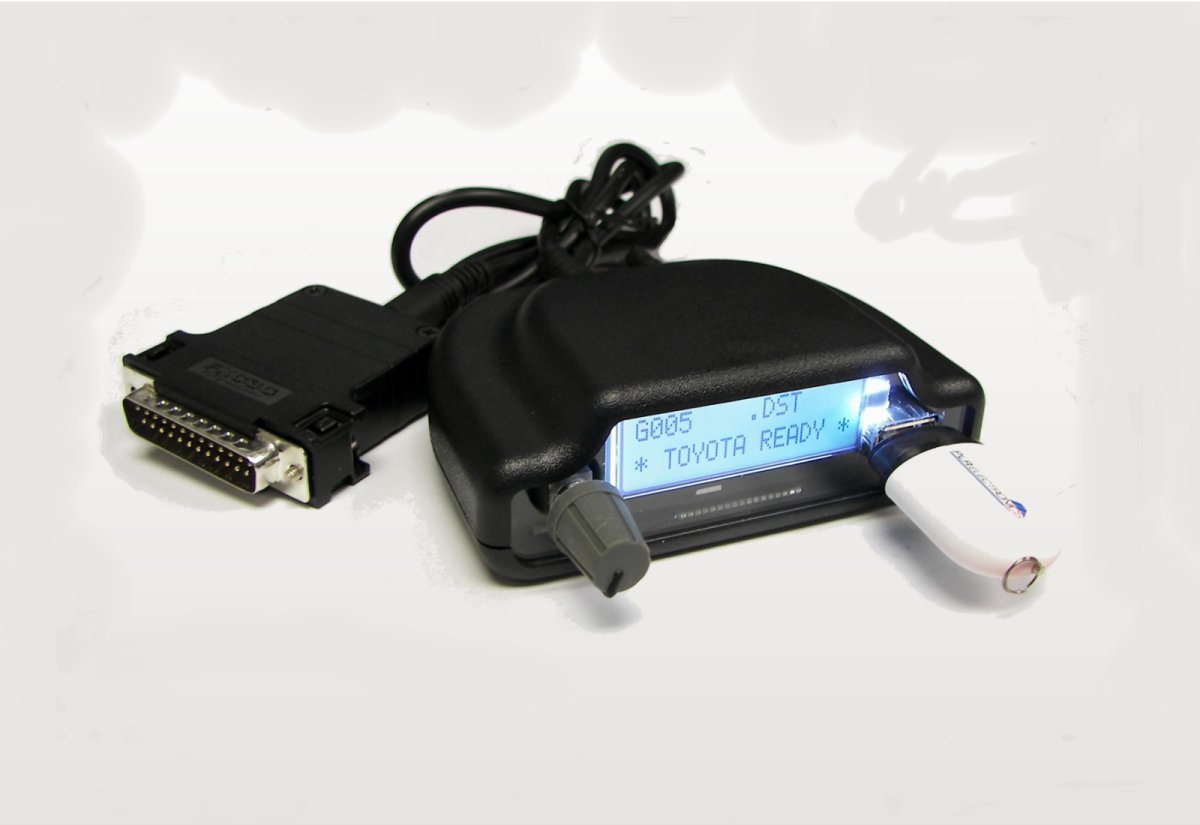
The picture shown is of a 25-pin communications plug, for the older Toyota machines up to the 830 model. The 850 model and above use a 9-pin plug, which we also sell. A common 9-to-25 pin Male to Male adapter can be used if you have the need to do so.
Be sure to setup your Toyota embroidery machine to CONNECT TO PC, and always use 01 for the download number.
USB for Happy Embroidery machines
The Happy control panel uses either a 24 pin SCSI connector similar to the Tajima plug or a standard 25 pin serial communications plug. Their models may have both, including a floppy drive.

The picture shown is a Happy tape reader port connector. Some Happy machines also use the same connector as the Toyota, above.
The USB Reader for Happy Embroidery machines is in the preliminary stages of sales; we have been unable to test or get feedback for many older models, until we build a client base up. Our USB communications key appears to work fine on the newer models, however because newer Happy models also have floppy disk drives they were a more appropriate candidate for our other product, the USB to Floppy disk drive replacement.
We’ve had good feedback on our few Happy sales, both of the serial and older SCSI connector, and we are willing to work with you. If you try out the USB for Happy and it is not compatible, we can either update our hardware to get it working, or you can return the product.
Hardware Overview
NOTICE: Turn the power OFF before attaching or removing any cable or connection! Power down your machine, power down the USB Reader, then you may attach cable and key. While the device can handle alot of hot-plugging, it is best not to tempt fate. Apply the same care with your personal USB sticks, and try to properly power them down when unplugging from your Windows computer.
Measurements
The USB Reader measures four inches across, by three inches deep, and an inch and a half height. It weights several ounces. The data cable is three feet long. The communication keys are of several different shapes, depending on what the target machine uses.
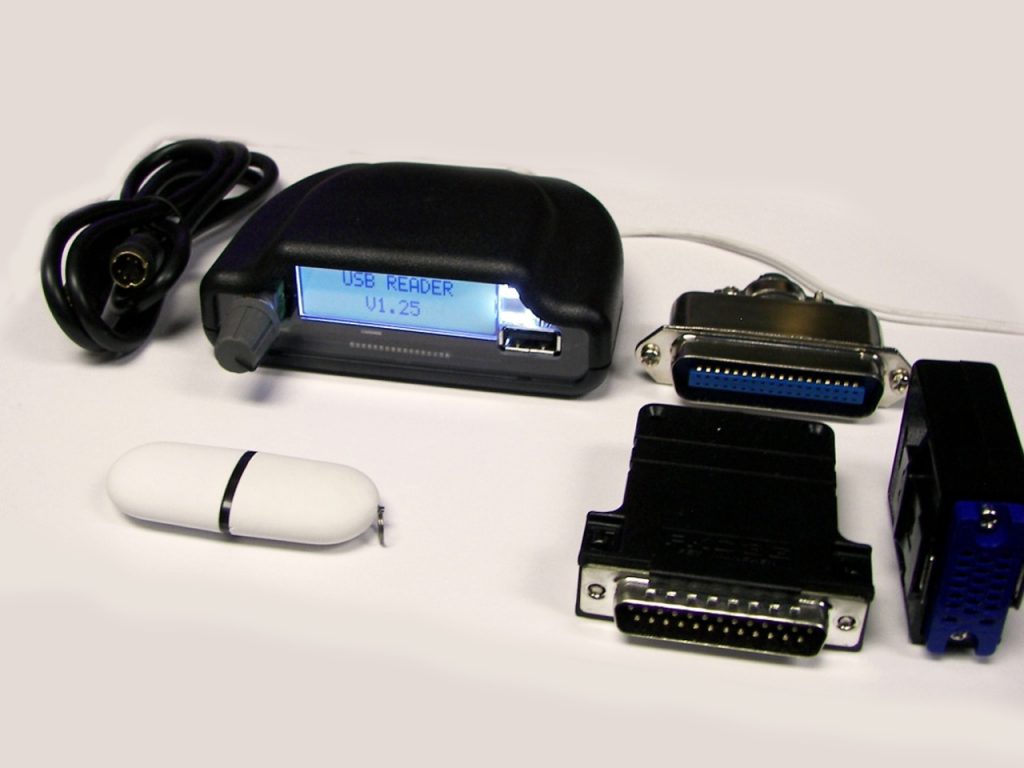
What’s included
An order of a USB reader uncludes the following items:
- One blacktop USB reader unit. It holds all the main electronics, and we refer to it in our company as the “blacktop”.
- One 9 volt power supply brick that runs off of 100-120V.
- One data cable
- ONE communications key, according to the customer’s machine type. We must have the make and model info from the customer to match the order, except for Tajima models.
USB Sticks, USB Drives, Thumb drives, etc.
A USB stick is not included but our blacktop USB Reader is highly compatible with 95% of USB sticks out there; from older 64mb sticks to newer 4GB+ brands. Supports both FAT16 and FAT32. If your USB stick does not work with our unit but your computer can use it, then we would very much like to know so we can update our firmware.
We also stock and sell USB sticks at a nominal price. (Optional USB stick is shown in all pictures.)
Additional Keys
Customers may purchase additional keys; however they are not designed to be plugged in and out of the blacktop unit five times a day; such abuse voids our warranty. We recommend owning ONE blacktop USB Reader per communications key, so the key may be plugged in permanently. If out of warranty, we of course can repair/replace each and every part for a nominal fee and shipping costs. And, as mentioned, keeping all parts completely unpowered when plugging and unplugging will extend life expectancy.
Warranty
We warranty our USB Reader for a full year. If defective, we will either refurbish parts or replace, at our discretion. As mentioned, abuse of the communication keys may void the warranty. Handle with care.
Backlight notice
We have had confirmed reports of the LCD backlight failing prematurely; we have discussed it with the LCD manufacturer and they claim no knowledge of such failures. If the backlight fails, either completely or partially, we will of course replace it either under warranty or for a small fee.
Operator Instructions
Prepare the USB stick
Make sure your USB stick has been previously formatted either in FAT or FAT32. NFTS or other filing formats are not supported.
Copy your Tajima DST files to the USB stick. DST files are an industry standard and your stitch editing program should be able to convert or export or save-as Tajima DST. Place all DST files in the main directory. It is recommended not to overload the stick with dozens of DST files, to save the operator time in scrolling back and forth.
Prepare the USB Reader
Make sure both the embroidery machine and the USB reader are unpowered. Make sure the data cable is plugged securely in the blacktop, and plug the communications key into the embroidery machine data port. If using a Tajima or Barudan, there should be a convenient 100V AC socket for plugging in the power cord. Now you may power up the machines.
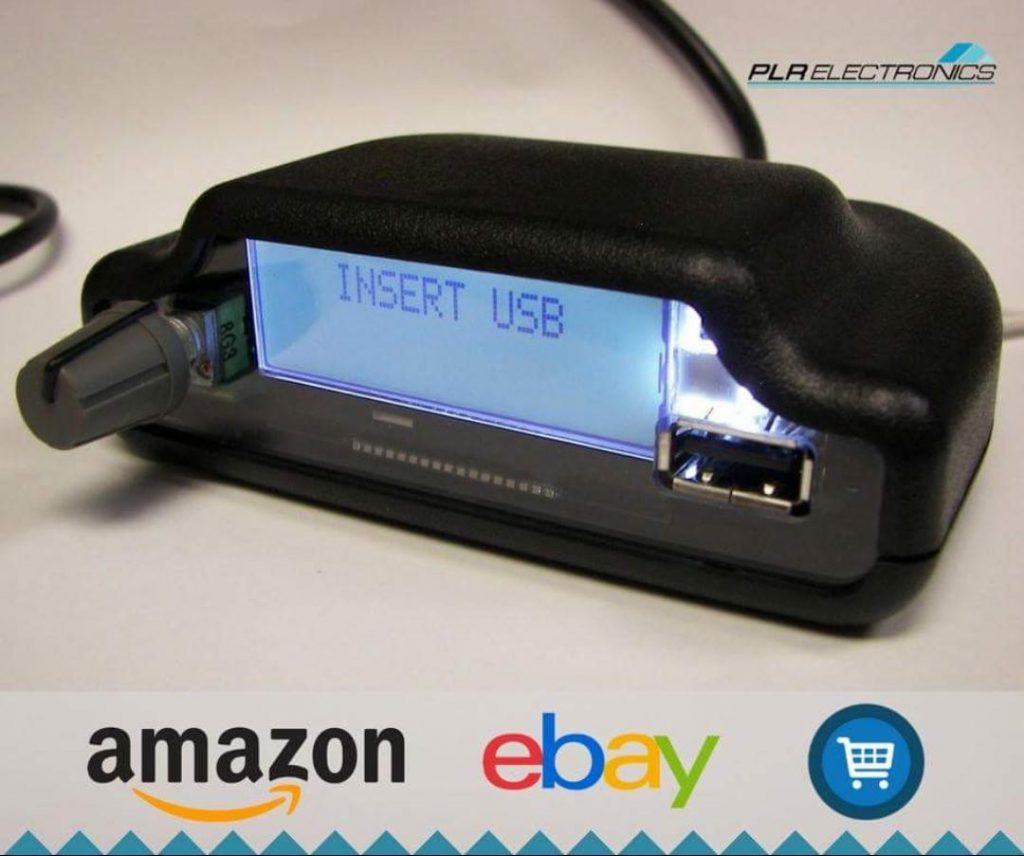
After the initialization sequence is done, the USB reader will say INSERT USB. Insert the USB stick here; although you may also insert the USB at any previous step.
Prepare to download
The USB Reader will scan the directory and pick out the DST files, and display the first one that is found. Use the grey spin dial to scroll to the left or right, and leave the dial alone when you are on the desired selection. After a few moments, the device will say READY.
Start downloading!
At this point, start the downloading process from your Tajima or Barudan or Toyota control panel. The steps are almost always make/model dependant. Sorry, we cannot make your control panel simpler as well! Some common control panel download instructions will be provided in the next section.
Common Errors
- INSERT USB displays even though I inserted the USB stick: Please cycle power to the USB reader unit and try inserting the USB again.
- INSERT KEY displays, instead of READY: Be sure that your data cable in back of the USB Reader is firmly attached to both the blacktop and the communications key.
- ERROR COMM FAIL: Damage may have occured to either the key or the blacktop. Ensure again that the data cable is plugged in firmly, try again, and then contact us.
- Download stops at 20 stitches: You have likely bypassed memory downloading, and asked your embroidery machine to download only one stitch at a time, as it sews it. Please check your control panel instruction manual.
- My stitch file is not on the list: Make sure the stitch file is in a compatible Tajima DST format, not any other format such as DSTS. Also there is a limit to how many DST files will be placed on the scrollable list; please limit the amount of DST files in the main directory to less than 50.
Cancelling Download
If you are in the middle of a download and want to cancel, simply spin the dial a few times.
Control Panel Instructions
Barudan 700, 800, BEAT-4 Instructions
The control panels on these machines are similar. It gives you the option of downloading a stitch file to one of ten memory locations. The stitch file may come from the internal MONOGRAM computer, through the SERIAL option, or from the external tape port, called the PTR option. You wish to download from the PTR port so press MODE and find a NEW memory spot, choose the PTR option, and make sure the tape code is B. Look at the USB Reader to see if it is READY, and then press DRIVE to begin downloading.
Barudan BEJR, BEJM, BEHJ.
Some of these old machines may or may not have memory cards. To download direct to stitch, make sure the switches are set for U code, and then flip the TAPE switch off, then on. The USB Reader should begin downloading at the point, up to a handful of stitches, and pull the bar to start sewing.
Barudan BESR
To load to a memory location, press the NEW button, and then press DRIVE. The BESR machine will start beeping in a second. Then press DRIVE again, and your stitches will download completely. To bypass memory instead, press the TAPE button and then press DRIVE.
Barudan BEMS, BEMR
The BEMS and BEMR are menu driven. Tell it to read from tape, using the standard U barudan code.
Tajima TMEF
Click on the following link for instructions: TMEF-600 Instructions
Tajima TMM
This uses the Melco type of control panel. It can either read tape directly or to a memory location (with optional card) or to a disk drive (not DOS compatible).
Tajima TME-H, TME-HC, TMEF-HC
Click on the following link for instructions: TME-HC Instructions
Data loading is on the 1st row, 1st column. This machine gives you the option to save to memory or stitch it direct, which is to download one stitch at a time. Type in 2 for Tajima to memory function, do not use 1 (Tajima tape) unless you want to bypass memory. Press SET to accept default options until you get to the last column, where you press 1 then SET.
Tajima TME-DC, TMEF-DC, TMFD-DC
This control panel looks and acts a little different than the HC model, even though it it mostly the same. Our techs here have a hard time figuring the difference. Column 1 is for direct stitching, and column 2 is for memory saving. Highlight column 2, and choose Tajima mode (1), and press SET. Fill out the other options according to instructions, or accept the defaults by pressing SET. On the last column, called DATA SET, press 1 and SET.
Tajima TMFX
Press Menu key A button until you get to the 3 T: option. T stands for the tape reader port, which is the default 36-pin metal plug. Press SET a few times to accept the default values and start downloading. Alternatively, if you own the serial key (similar to the Toyota picture) you use the 4 S: option, although this is not recommended for use with the TMFX2+ series because of the different speeds on each board.
Toyota 800, 820
Clear the memory by pressing the CLEAR button. When it asks for a number, use the number 01. Press SET and it will start downloading.
Toyota 820A, 830
Push START POINT then SET. Choose INSERT DESIGN then SET. It will ask for a design number, and choose 01 for the number. Press SET to begin.
Toyota 850, 860
Make sure that your dipswitches are set to allow downloading from PC, not two-way control with the PC. If your control panel says number 0000 instead of 00, then you need to change your dipswitch, the bottom one on DSW2. Make sure the floppy function is disabled, the top button on DSW2. Insert a new design and press 1 or 01, then set.
Pictures
We have a few larger pictures available of the product here.
- Tajima USB Reader Large
- Barudan USB Reader Large
- Toyota USB Reader Large

2 thoughts on “About the ‘Black Box’ – Embroidery USB Reader”
Hello,
I own a 2005 Happy 1201-30 with sd card I dont have a thumb drive and I must keep a laptop plugged into the embroidery machine via Usb cable or a serial cable. Do you offer an option for me to use a thumb drive like you black box?
Thank you.
thank you for tajima TME TMEF USER MANUAL
I have Tajima TMEF 610
HOW DO I GET A NEW USB READER FOR MY TAJIMA
HOW IT COST TO SEND TO MY CANTERY EGYPT
Comments are closed.