
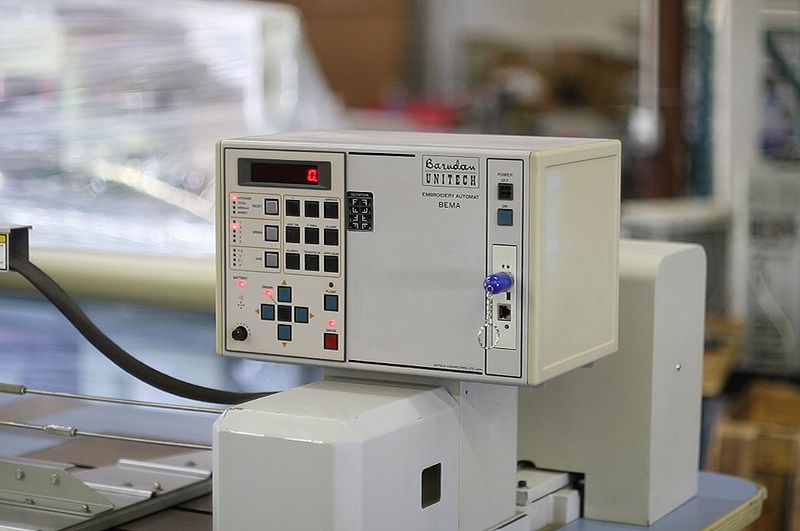
Barudan BEMR User Manual
Instructions
(C) 2009-2018 PLR Electronics

Basics
Control Panel Keys
- NUMBER PAD: To enter number selections.
- MENU KEYS: Underneath the monitor, labeled A through G. The A key is only for advancing through the current menu, and the G key is for changing menus. The other keys select the menu selection directly above them.
- # KEY: To change the current design pattern. Press # then number then SET. Not active in drive mode.
- N KEY: To manually change needles. Press N then number then SET.
- CL: The clear buttton, or backspace button.
- ORIGIN: This is the key in the middle of the ARROW keys. If you move the pantograph manually during a design, this key moves you back to where the computer left off.
- PLUS AND MINUS KEYS To advance through lists.
- ON AND OFF To control power to the control panel; does not control power to the lower electronics and main relay box.
Main menu list (press G for more menus)
- READ: To load a new design from the floppy or tape port.
- EDIT: To edit the design.
- MANUAL: To manual thread trim, or activate/release thread clamps so you can thread the heads.
- PROGRAM: To resize or rotate design, or set offset or cap frame/regular frame.
- DRIVE: To enter drive mode.
- >PUNCH: To export a design.
- >FLOPPY: To initialize the floppy disk.
- >DSP: To do higher quality resizing, or to adjust for satin stitches.
- >MC: Machine parameters menu.
Drive menu list (only when DRIVE mode is activated)
- FLOAT: To advance through the design without sewing. Press FLOAT, then the stitch number, then press SET.
- TEACH’G: To program the color change.
- MANUAL: Same as the main menu version.
- PROGRAM: Same as the main menu version, but read-only. You cannot make changes in DRIVE mode.
- ABORT: To leave DRIVE mode.
- >MIRROR: To quickly mirror the sewing.
- >MC: Machine parameters menu.
- >LIST: Same as the main menu version, but read-only. You cannot change the current pattern in DRIVE mode.
Head identification
- STANDARD HEAD: One take up lever per head.
- YS HEAD: Seven take up levels per head, i.e. individual take up levers per needle.
Bar switch and button (under table)
- BAR SWITCH LEFT: Pull bar to the left to start sewing.
- BAR SWITCH RIGHT: Pull bar to the right stop sewing.
Frame move
- ARROW KEYS: To manually move the pantograph. Movement will be in opposite direction to the key.
View existing designs
1. Press the G key until you see the LIST menu.
2. Press the key underneath LIST to enter.
3. The list of designs will be displayed.
4. Press the A or the PLUS(+) and MINUS(-) keys to scroll the list.
5. Press the G key when done.
Load a new design
Loading from the Floppy Disk or USB drive.
1. Press the G key until you see the READ menu.
2. Press the key underneath READ to enter.
3. Choose the memory location to write to by pressing #, then the number, then SET. There are 36 total locations.
4. Choose the DEVICE menu option until DISK appears at the top.
5. Please wait while the disk is being read. Make sure files on the disk are only named G001.DST, G002.DST, etc.
6. A list of the disk files will appear.
7. Press the A or the PLUS(+) and MINUS(-) keys to scroll the list and highlight the desired file.
8. You may also select a empty memory location to store to, if you did not already do so; Choose the LIST option and select an empty location, and press G when done.
9. The memory number will be displayed to the left. If you chose a memory location that is already used, you may overwrite it by choosing the NEW/ADD option, until NEW appears in the middle of the screen. Do not choose ADD
10. When ready to start loading, choose the START option.
11. Done!
Loading from the Tape Reader or USB Reader.
1. Press the G key until you see the READ menu.
2. Press the key underneath READ to enter.
3. Choose the memory location to write to by pressing #, then the number, then SET. There are 36 total locations.
4. Choose the DEVICE menu option until U-TAPE appears at the top.
5. You may also select a empty memory location to store to, if you did not already do so; Choose the LIST option and select an empty location, and press G when done.
6. The memory number will be displayed to the left. If you chose a memory location that is already used, you may overwrite it by choosing the NEW/ADD option, until NEW appears in the middle of the screen. Do not choose ADD
7. When ready to start downloading, choose the START option.
8. Wait until done. Success!
You don’t have a USB replacement yet? Purchase a new USB Floppy Disk Drive for your Barudan BEMR machine! Look at the front page of PLR Electronics for more!

Select a design in memory
1. Make sure you are not in DRIVE mode. If you are, then ABORT.
2. Press the # key.
3. Choose a number on the keypad.
4. Press SET when done.
Setting color change
1. You must be in DRIVE mode to set colors. Select the DRIVE menu option.
2. Select the TEACH’G menu option. It will now be highlighted.
3. Press SET. The pattern will advance on the screen until the first color change.
4. Choose a number, and press SET.
5. Repeat until finished.
6. Remember there is no color change for the first stitch.
Erasing design in memory
1. Press the G key until you see the LIST menu.
2. Press the key underneath LIST to enter.
3. The list of designs will be displayed.
4. Press the A or the PLUS(+) and MINUS(-) keys to scroll the list.
5. Select the file you wish deleted by highlighting it.
6. Choose the DELETE option by pressing the button underneath it.
7. It will ask you YES or NO.
8. Make your selection by pressing the key underneath.
9. Press G key when done.
Immediate thread trimming
1. Press the G key until you see the MANUAL menu.
2. Press the key underneath MANUAL to enter.
3. Choose the T.TRIM option. It will light up.
4. The screen will say START WITH BAR SWITCH
5. Pull the bar to the left.
6. The thread trim will activate and take you back to the main menu.
Immediate Needle Change
1. Make sure you are at the main menu screen.
2. If you are not at head up, then do a thread trim operation first
3. Press the N KEY.
4. Type in the number of the needle.
5. Press SET.
6. The needles will now change.
Error codes
Automatic shut-down
If the pantograph hits any of the X or Y limit switches, then the machine will turn off and will not start. Move the pantograph manually or adjust the limit switches.
BEMR Errors (and Stop codes)
- A01: Battery is low. Please replace batteries on the side of the control panel.
- A03, A04, A05, A06: Tape Reader problem. Check the tape reader and connections.
- A07, A08: Error in memory. Delete some designs, or delete everything by removing battery.
- A11, A19: COM port error. Use the floppy or tape reader instead.
- A20: No data loaded.
- A21: Memory is found to be empty. Check battery.
- A22: Needs permission to join two designs together.
- A23: Needs permission to erase the design in the current memory location.
- A24: No more colors found.
- D01: Needle bar position. Make sure one of the needle positions is locked into. Check color change board for status.
- D03: Needle bar lock. Make sure the needle bar is locked in. Check color change board for status.
- D04: Needle positioner. Check the color change.
- D05: Unable to color change. The motor cannot spin or there is something jamming one of the heads from spinning.
- D06: Tripping main motor. Check main motor for problems. Check that three phase power is coming in. Check main shaft.
- D07: Overload of main motor. Check main motor for problems. Check encoder.
- D08: Frame limit. Software frame limit warning.
- D09: Bar switch activated.
- D10: Unable to detect origin point. Check the origin sensors, near the limit switch sensors.
- D12: Trimmer’s slider. Check all grabbers behind the needle, that they are up where the sensor can see them.
- D13: Unable to stitch back. Trying to go backwards too far, or the bar switch was pulled the wrong way.
- D14: Start with bar switch. Pull the bar switch to the left or right.
- D15: Top thread break.
- D16: Bobbin thread break. Check bobbin.
- D17: Stopped TEACH’G.
- D18: Thread break. Check that you have threaded properly, that the sensor metal is clean enough and tensioned correct.
- D19: STOP function. Auto color change was not programmed.
- D20: End of automending.
- D21: Stopped by bar switch. You may start again when ready.
- D22: Trim motor error. Make sure the scissors can trim freely underneath the needle. Check trim motor on the far left.
If unable to control pantogram, or the control panel is stuck at origin seek, then check cables and reseat the CPU cards underneath, with power off. Contact our repair department if you suspect damage.
(C) 2009-2018 PLR Electronics