
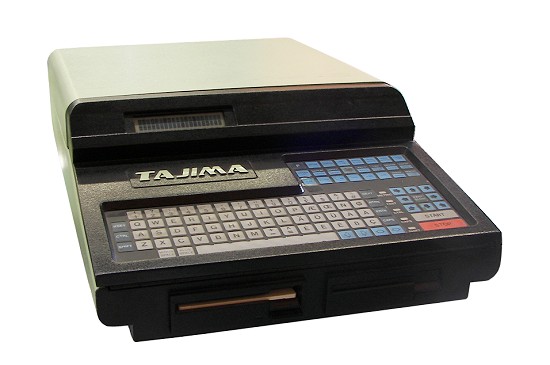
Tajima TMM User Manual
Instructions
(C) 2009-2018 PLR Electronics

Basics
Here are some kinds of the Tajima TMM machine:
- TMM-H: Flat frame, main motor underneath the control panel. Underneath bar switch.
- TMM-HC: Cap frame, main motor behind the machine. ON/OFF buttons instead of bar switch.
Keyboard commands
- SHIFT CTRL RESET : Soft reset. To unload the design and cancel all commands.
- READ TAPE RUN: To start loading from the tape or USB reader.
- F CREEP: Manual color change, ATH, head up operation.
- F TRANS: To switch between memory load operation or stitch one-by-one operation.
- COLOR CHNG: Setup color change. Choose between automatic or manual.
- SWAP/MIRROR: To rotate the design.
- F STATUS: Jump options, thread break on/off, cap/flat.
- READ DISK RTRN: To start loading from disk drive.
- WRITE DISK RTRN: To save from tape to disk drive.
- DISK 1 RTRN: To make the left disk drive active.
- DISK 2 RTRN: To make the right disk drive active.
- DISK F RTRN: To format a disk.
- DISK D RTRN: To list the disk contents.
- START: Start sewing, or start downloading.
- STOP: Stop sewing or backup stitches.
- DARK ARROW KEYS: Move the pantograph.
- WHITE ARROW KEYS: Change the RPM sewing speed.
- FAST/SLOW: To change pantograph speed in manual mode.
- NEXT: To scroll through menu options.
- RTRN: To make a menu selection. Make extra sure whether you are supposed to press RTRN or ENTER.
- ENTR: To make a menu selection. Make extra sure whether you are supposed to press RTRN or ENTER.
- RESET: To cancel error message. No commands will work until error is reset.
Frame move, ATH, RPM
- MOVE FRAME: Use the black arrow keys to move the frame.
- IMMEDIATE COLOR CHANGE: Press F CREEP NUMBER. The number will be the desired color. Press RTRN when finished.
- IMMEDIATE THREAD TRIM: Press F CREEP T. The machine will beep and then trim.
- HEAD UP: Press F CREEP WHITE-UP-ARROW. Use this if you are off the stop position. Make sure to hit reset if there are errors displayed.
- CHANGE R.P.M. SPEED: During stitching, press the white number keys.
Load a new design
Sew directly from the tape or USB reader.
1. Make sure the tape reader is ready.
2. Make sure the control panel is ready to accept commands. Soft reset if it is not.
3. Make sure to set color change sequence first.
4. Press READ TAPE RUN. The pantograph will seek origin.
5. Press START. It will pre-load about fifty stitches.
You don’t have a Tape Reader? Purchase a new USB Reader for your Tajima TMM machine!

1. Make sure the floppy disk is loaded in the drive and is formatted in the TMM format.
2. Make sure the tape reader is ready.
3. Make sure the control panel is ready to accept commands. Soft reset if it is not.
4. Press F TRANS.
5. It will ask for stitching mode or transfer mode. Press NEXT until it says TRANSFER MODE. Press RTRN.
6. Press WRITE DISK RTRN.
7. It will ask for a name. Choose a name and press RTRN when done.
8. Press READ TAPE RUN START.
9. Downloading will start, it will say END OF DESIGN when done.
10. Do a soft reset by pressing SHIFT CTRL RESET.
Sew from a file stored on disk.
1. Make sure the floppy disk is loaded in the drive.
2. Make sure the control panel is ready to accept commands. Soft reset if it is not.
3. Make sure to set color change sequence first.
4. Press READ DISK RTRN.
5. It will ask for a file name. Type it in and press RTRN.
6. The machine will seek origin here.
7. Press START to begin sewing.
Format a TMM floppy disk.
1. Make sure the floppy disk is loaded in the drive.
2. Make sure the control panel is ready to accept commands. Soft reset if it is not.
3. Press DISK F RTRN.
4. It will ask FORMAT DISK? Press Y then RTRN.
5. It will ask HI-REL or NORMAL? Press NEXT until it says normal and press RTRN.
6. It will say MOUNT DISK, ENTER. Press ENTER to begin.
7. It will say FORMATTING, then VERIFYING.
8. It will ask FORMAT ANOTHER? Press ENTER to finish.
NOTICE: The USB floppy replacement is not compatible with the TMM at this time. Please use the USB Reader, instead.
Setting color change
Note that color change must be done BEFORE you load a design from either tape or disk drive.
1. Press COLOR CHANGE.
2. It will say AUTO COLOR CHANGE. Press NEXT to switch between AUTO and MANUAL.
3. Choose MANUAL and press RTRN.
4. It will say COLOR 01: 1 2 3 4 5 E
5. The current color will be flashing. Press the number keys to select.
6. Use the WHITE ARROW KEYS to move around if you make a mistake. Pressing up or down will add or remove entries.
7. Press RTRN when done changing colors.
8. It will ask if you want to AUTO START after each change. Press RTRN to finish.
Manual color change
1. Press F CREEP.
2. It will say the current needle number.
3. Press a number on the keyboard to immediate move to that needle.
4. Press RTRN when done.
Immediate thread trimming
1. Press F CREEP.
2. It will say the current needle number.
3. Press the T letter on the keyboard.
4. It will beep and thread trim immediately.
Erase design from floppy
1. Press DISK D RTRN.
2. Press NEXT until the file is selected.
3. Press the K key on the keyboard.
4. It will say KILL FILE? Press Y, then press RTRN.
5. Press ENTER to cancel, or when done.
Tajima TMM Error Codes
Press the RESET button to cancel most errors. You may have to press RESET in the middle of menus.
- CONTROL CARD FAILURE: Cannot startup (top unit) or communicate with machine card (bottom unit). Check the 9 pin serial cable in back of control panel.
- MEMORY INITIALIZED: All settings have been reset, you may want to double check settings.
- MD TIMEOUT: Communications problem. Cycle power to machine.
- Z80-CTC ERROR: Problem with the timer chip. Cycle power.
- 01-NO FUNCTION CODE: No data coming in from tape reader.
- 02-BAD STITCH VALUES: Incorrect data coming from tape reader.
- 03-ILLEGAL END CODE: Incorrect data coming from tape reader.
- 04-BAD FUNCTION CODE: Tape reader data does not match the code you selected (usually Tajima)
- 05-WRONG TAPE FORMAT: Tape reader data does not match the code you selected (usually Tajima)
- 08-PTR SIGNAL ERROR: The tape reader was unset. Set the reader and try again.
- 11-DATA INCOMPLETE: No data loaded. Please load data first.
- 12-EXCESSIVE BACKUP: Holding down the STOP button when you cannot back up the stitch count.
- 51-STOP POSITION: The main shaft is not at head up. Please set manually, or use the HEAD UP command F CREEP WHITE-ARROW-UP.
- 52-RACK LIMIT: Frame limit was reached. Move away from the limit switch.
- 53-STEPPER MOTOR: Error with the DU-7 or DU-8 stepper motor driver.
- 54-COLOR CHANGE ENDS: Color change cannot reach desired needle number.
- 55-COLOR CH. TIMEOUT: Color change motor cannot move.
- 56-ONE TURN SIGNAL: Color change is not at stop position. Turn color change manually.
- 57-COLOR CH. DETENT: Color change encoder is not acting correctly.
- 58-MAIN SHAFT MOTOR: Main shaft is not spinning. Check if your 3-phase wiring is correct. Check if the brake box red light is lit; if so, rotate two of your 3-phase 220V wires in the plug.
- 89-ZERO NEEDLE ERROR: Damage to the 5516 EEPROM. Get technical support.
- 91-CTS ERROR: Communication error between control panel and machine card.
- 92-BAD EEPROM: The 5516 EEPROM is corrupt. Replace.
- 93-MD EPROM CHECKSUM: PROM U3 and U4 are corrupt. Replace.
- 94-RACK DATA TIMEOUT: Data not coming in fast enough from the control panel.
- 95-RACK POSITIONING: Pantograph was moving while needle came down.
- 98-CAP CENTER ERROR: Frame is outside cap sewing limits.
- BAD SECTOR WARNING: Use another floppy disk.
- SEWING HEAD BUSY: Do not use CREEP while machine is busy.
- DRIVE NOT READY: There is no disk in the disk drive.
- CANNOT FIND FILE: Did you type the file name correctly?
- ILLEGAL FILE NAME: You may only use six letters or numbers.
- DISK IS FULL: There is no more room on the disk.
- BAD SECTOR WARNING: The disk may be failing.
- ILLEGAL SECTOR: The disk is damaged.
- CRC ERROR: The disk is damaged.
- END OF FILE: An error occured while writing the file.
(C) 2009-2018 PLR Electronics