Dear Customer,
Here is a walkthrough that you might find useful for WiFi Setup purposes:
When you initially receive the WiFi device, you will first need to connect it via USB port to your
computer; once your system detects the device you will be able to open the device to see what it’s
contents are in your file explorer for previous versions of Windows or ‘This PC’ on windows 10. The
device will show up in your file browser as “USB2WIFI”.

At this point you will need to go online and download the latest version of JAVA directly from the
JAVA website and when you are running the current version you will be ready for the next step. For
safety and efficiency, please be sure to only trust downloads that are provided directly
from www.JAVA.com.

You will need to return to the ‘File Explorer’ or ‘This PC’ and open the WiFi device to view its contents
by double clicking on it in your file browser. You should then see a webpage link, please right-click
this link and choose the option “Open With >” then select “Internet Explorer” to open the webpage
link.
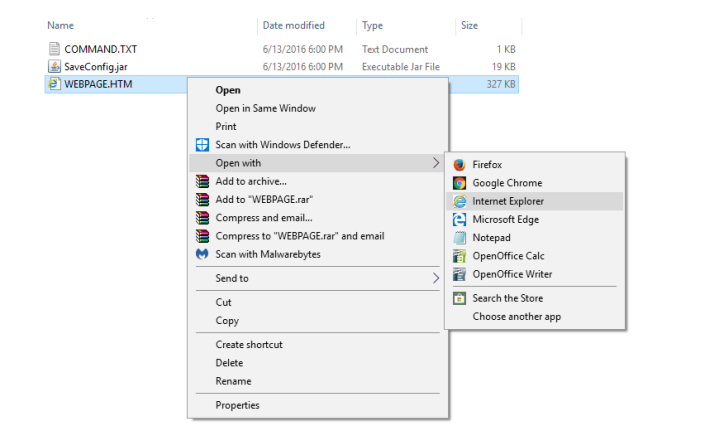
Take care not to select “Microsoft Edge” as the logo is similar to “Internet Explorer” which is the one
we want to select. When correctly opened in “Internet Explorer” you will get prompts upon going to
that webpage via the link inside the WiFi Device; these prompts are JAVA applet request prompts
that you will need to “Allow” for permissions.
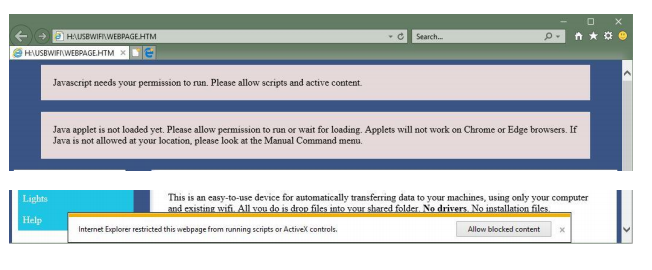
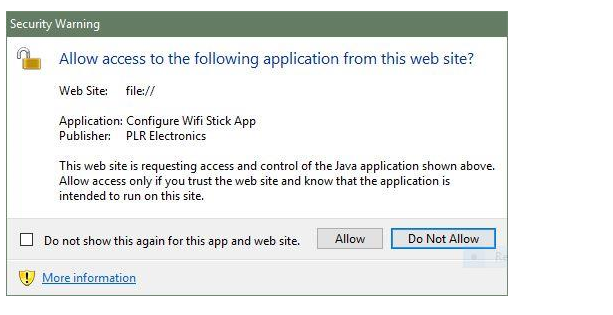
The applet requests you are getting are standard for the WiFi Device and it’s requirements, it works
with JAVA to connect correctly. This is why it is important to have the latest updated version of JAVA.
These browser compatibility issues will be fixed in later updates, however it is the standard operating
procedure at this time. Upon loading said page in Internet Explorer, you will need to allow all JAVA
prompts to run, make sure to “Allow” so that JAVA has the correct privileges to access the WiFi
Device. It will not be possible to enable connectivity functionality without following this procedure at
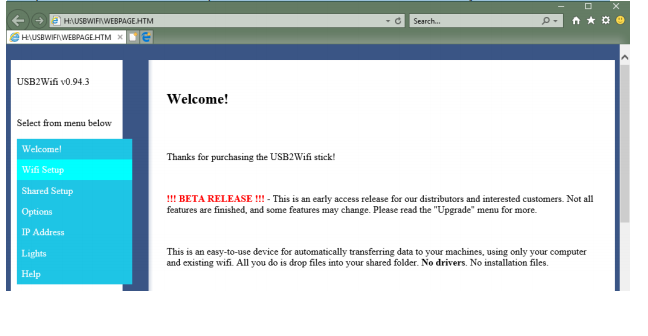
this time. Upon allowing all of the required prompts you will notice that the text at the top of the
webpage listing information about required JAVA applets has dissapeared. We are now ready to
proceed to the next step in the process.
At this point you will notice to the left of the main viewing area on the webpage there are a number
of topics listed as tabs. WiFi Setup is listed as one of them, and this is what you will need to select.
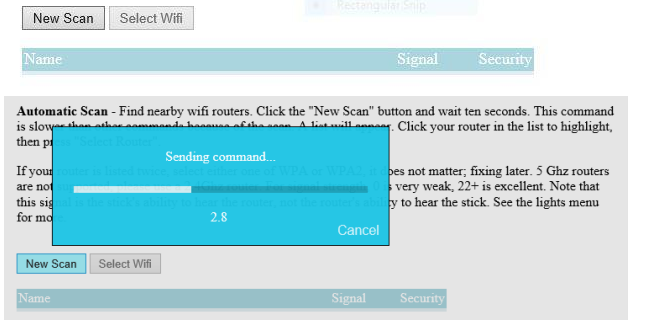
Please follow the listed steps and read the information provided. The majority of our customers are
able to proceed at this point to perform a “New Scan”. Please allow ample time for the New Scan to
complete.
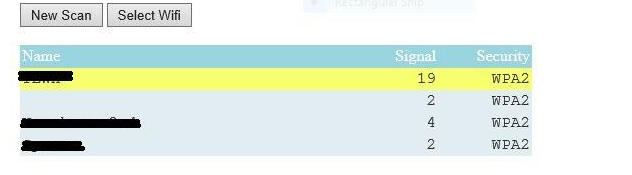
Upon completion of this scan you should see your router name along side any other available
network options. This portion of the setup process is very similar to connecting to any other WiFi
device that you may use. You will need to click on your personal network as you have named it and
make sure that your selection is indicated by a yellow selection field.
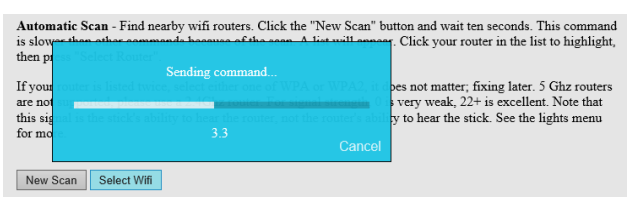
When you can visually confirm this please proceed by clicking on the “Select WiFi” button and allow
ample time for the process to complete.
Once you have completed this step please scroll down until you see the section titled “WiFI
Password”. Underneath this section you will see a text field with the phrase “type password here and
click the button” This is the text field where you will need to enter your personal network password
as it exists with your current network setup, take care in this process as Phrases and Keys are case
sensitive and must exactly match your WiFi password used for other devices on your network.
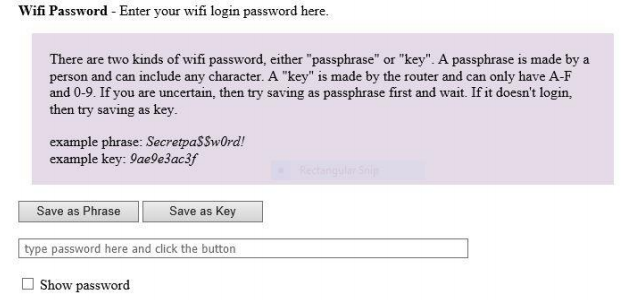
you have entered this information go ahead and proceed to click the “Save as Phrase” button. A
phrase is what the majority of customers will be using. If you have an advanced or larger scale
network setup that you believe might require a “Key” password please consult your Network or IT
personnel for any information you might require for this phase of the process. We are also available
to provide support for more complicated setup processes, though communication and information
exchange with said personnel will generally still be necessary for complex setups. After selecting
“Save as Phrase” and allowing the process to complete, you should within approximately 15 seconds
have connectivity with your WiFi device.
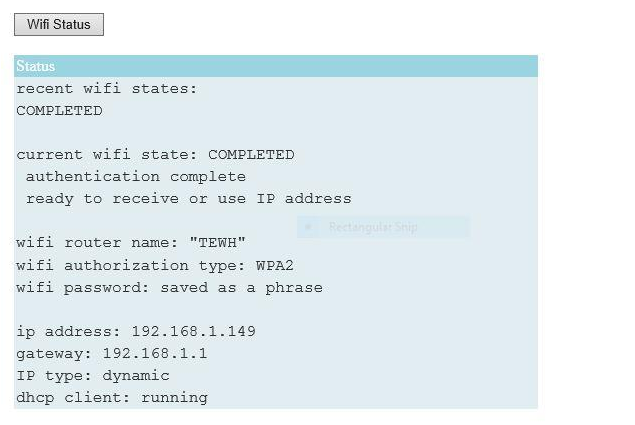
Please at this time read the prompt listed beneath the section where we just performed these steps:

You should see stable connectivity indicated by two solid green LED lights on the WiFidevice at this
time. Please feel free to click the “WiFi Status” button at this time; this will give you a clear indication
and additional details about the connection and should show that the process is completed and
successful.
We will now need to begin the shared folder setup process.
First begin this process by minimizing but NOT closing the active e webpage that we have been
using for this setup process. Please navigate to the desktop of the PC which you intend to use for the
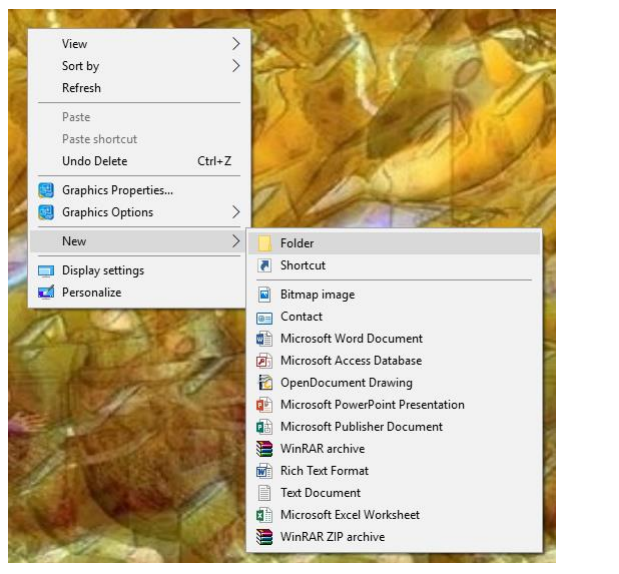
file sharing process. Please right click on your desktop background and select the option “NEW >”
then select “Folder”.
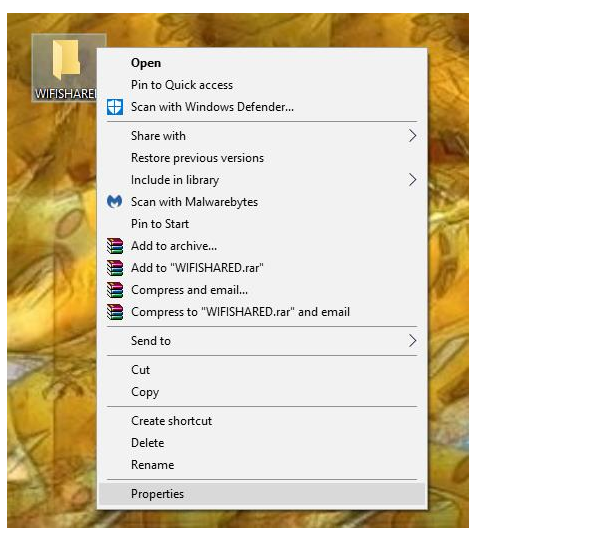
You should now have a blank folder that you just created available on the desktop. The folders text
should be highlighted by deafault, ready for you to enter the new name of the folder. Please name
the folder something that will help indicate that it is for sharing files; something such as WIFISHARED
will do just fine. We will now need to change some properties of this new folder in order to enable
file sharing capabilities. Please do this by right clicking the folder and selecting “Properties” listed at
the bottom of the pop-up window that appears after right clicking the folder.
Clicking properties will open up a new window with some tabs at the top of the window. You will
need to select the second tab from the left which is titled “Sharing”.
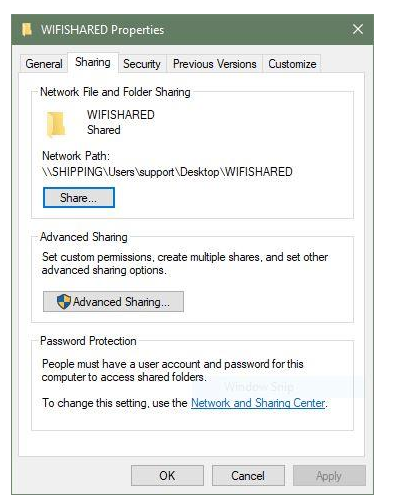
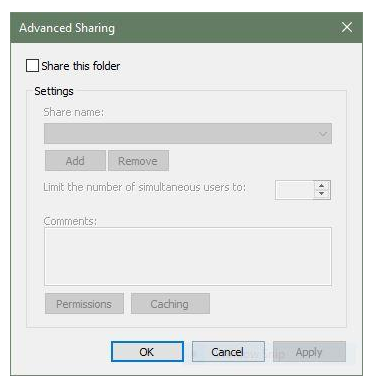
Once on the sharing tab you will see a few options, you will need to select the “Advanced Sharing”
option. This will open a new window called “Advanced Sharing” and at the top of the popup window
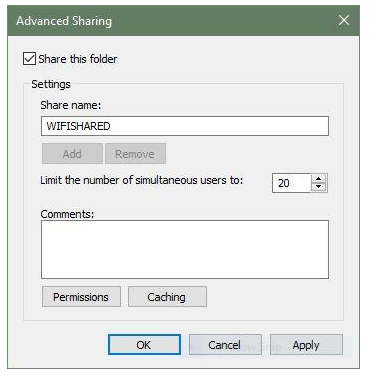
there will be a check-box with the text “Share this folder” next to it. Please select this option.
Upon making this selection you will see that other options within the window become available.
Please look toward the lower half of the window to the button titled “Permissions”. Please click on
“Permissions” at this time.
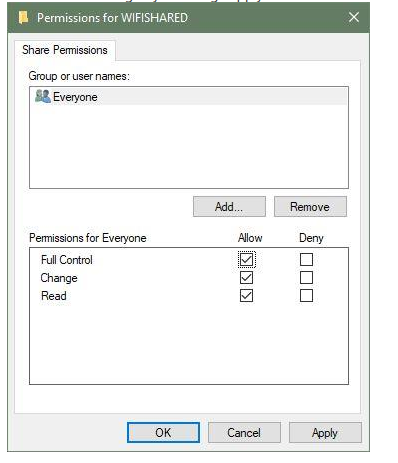
This will open yet another window titled “Permissions for (folder name)”. Note that in the lower half
of the window under a section titled “Permissions for Everyone” there are listed three details: Full
Control, Change, Read. Please make sure to select the checkboxes under “Allow” for all three options.
Please follow through by selecting “Apply” and then “OK”.
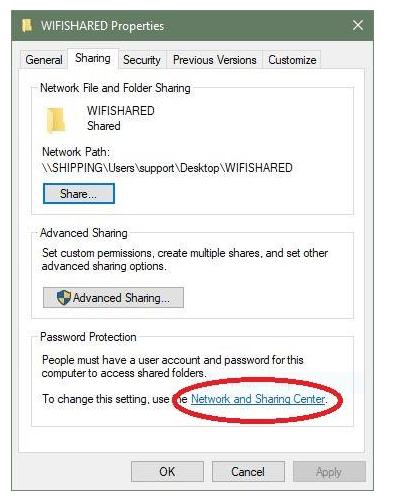
You should now see the properties menu again and should still be on the “Sharing” tab. Now look to
the bottom of the window and select “Network and Sharing Center” which will be in the form of a
blue hyperlink.
This will open a new window with more options.
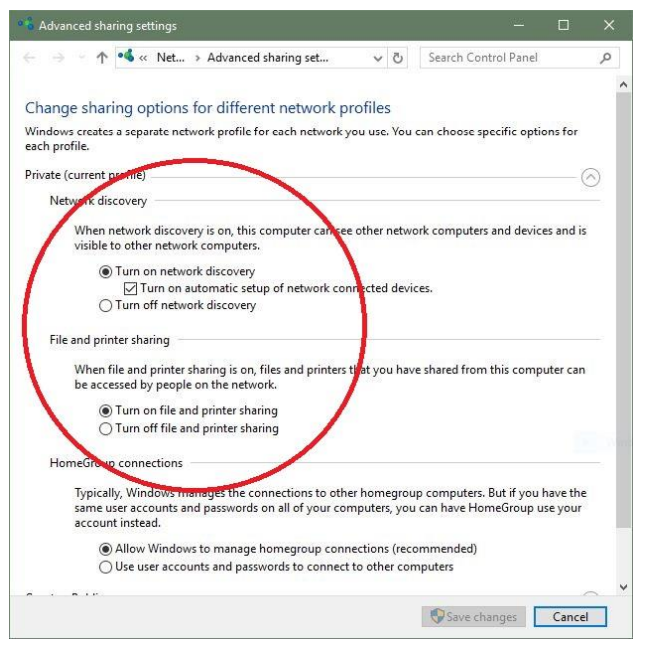
You will see listed immediately two bubble-select options that are under “Network discovery” Make
sure the option “Turn on network discovery” is selected. Then further down the window you will see
a section titled “File and printer sharing” this also lists two bubble-select options. Please make sure
that “Turn on file and printer sharing” is selected. Then please click the “Save Changes” button at the
bottom of the screen.
You may now select “Close” on the properties window that we opened previously.
You are now ready to maximize the webpage that we used earlier in the process and we had
minimized.
You will see a section to the left listed under “WiFi Setup” (the tab we selected before) that is titled
“Shared Setup”.

Please select this option and the content in the main viewing area of the webpage will change.
Please read the information listed at the top of the screen on the webpage as it may be helpful in
this process. The next step is similar to the first portion of the setup where we scanned for our WIFI
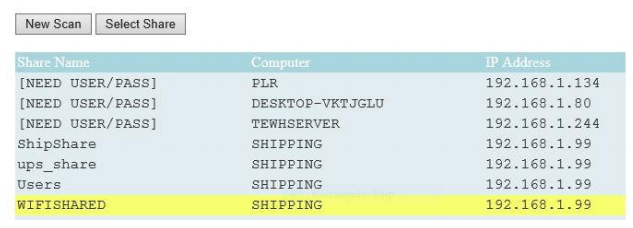
router name. Please select “New Scan” and allow ample time for the scanning process to complete.

If you followed the previous steps correctly you should now see your recently created shared folder
listed under the title that you gave it. If you see your shared folder, go ahead and select it in the
listed field and then click the “Select Share” option. Please give this time to complete the process and
for the change to register, approximately 15-30 seconds.
You may now read the prompt beneath the “Select Share” button which is listed in purple. This will
help to explain what is needed if the connection to your shared folder is initially unsuccessful. I.E.
there may be additional steps necessary such as scrolling down to the manual section to enter your
USER ID and PASSWORD. If you require additional assistance with this portion should it be necessary
for your setup process, please contact PLR Electronics at support@plrelectronics.com and you will be
contacted as soon as possible for assistance with the setup process.
Please at this time select the “Test Share Folder” button beneath the purple prompt to verify that the
connection was successful. If your test results show a positive and successful connection, then you
are now ready to share between the folder and WiFi Device.
Please feel free to remove the WiFi Device from your computer and allocate it to the hardware you
intend to share files to at this time. You will now be able to freely send files from your shared folder
to the WiFi device. Please allow several seconds for any files to be shared upon placing them in the
Shared Folder you created. They will appear in the WiFi Device moments later ready for reading and
usage. You have now completed the setup process and are ready to begin using your wireless media
transfer system with your business. If you have any questions about any step of this process or
should require additional assistance please contact us via our support email as mentioned earlier in
this walkthrough. Thank you for your purchase and interest in PLR Electronics products. We look
forward to providing continued innovative solutions to your businesses technical needs.